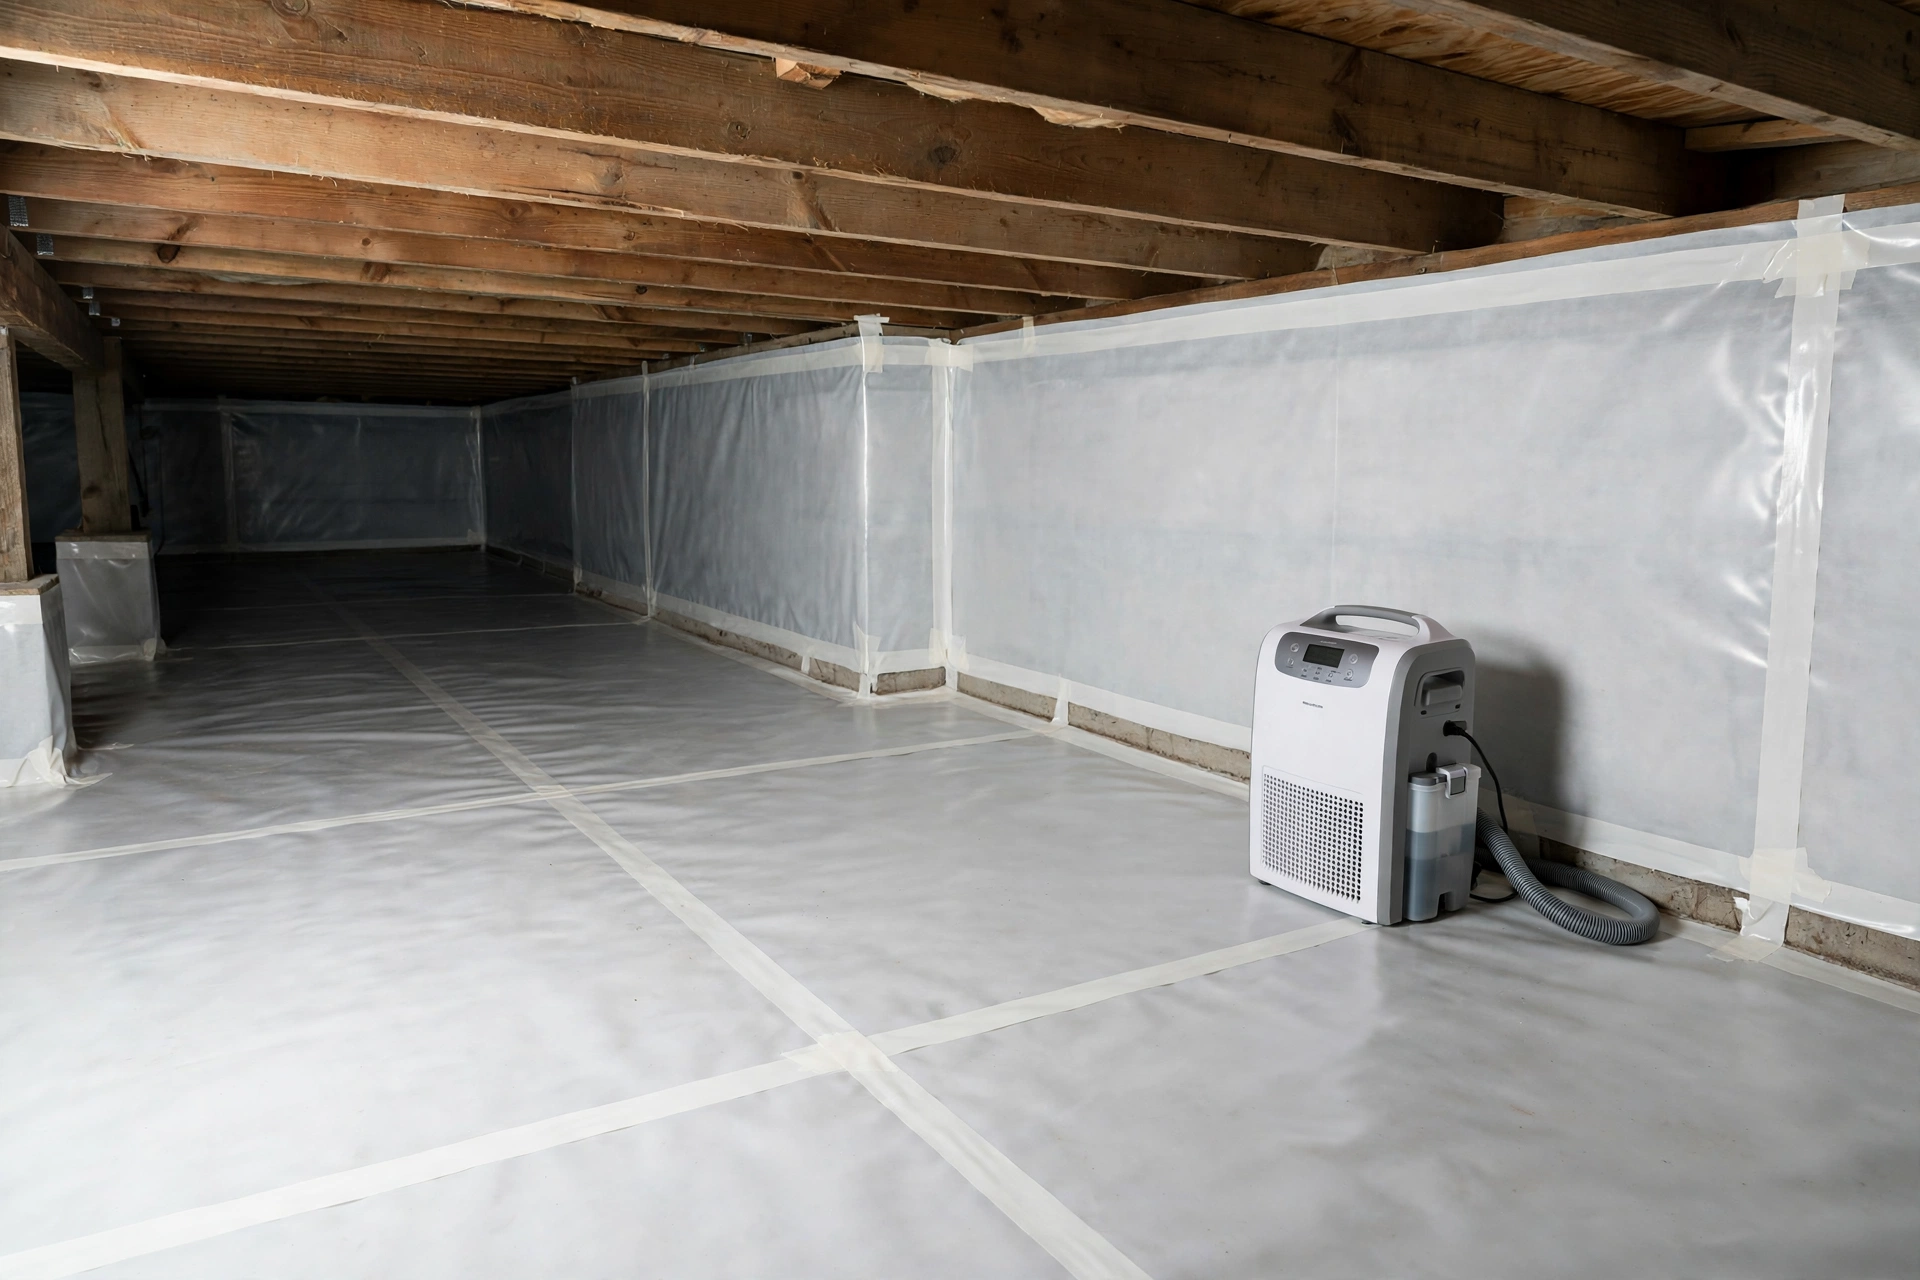
Best Crawl Space Encapsulation Materials That Protect Wooden Floors From Moisture Damage
The best crawl space encapsulation materials for protecting wooden floors are a 20-mil reinforced polyethylene vapor barrier on the floor and walls, a dimpled drainage mat underneath it, rigid foam board insulation on the foundation walls, and a dedicated crawl space dehumidifier holding relative humidity between 45 and 55 percent. Together, this system cuts off ground moisture, blocks humid outside air, and keeps floor joists and subflooring dry enough that rot and mold cannot take hold.
Wooden floors fail from below long before they show trouble on top. Damp air rising from bare soil condenses on cool joists, feeds mold, and softens the subfloor until boards sag, squeak, or cup. Encapsulation treats the crawl space as part of the house, sealed and conditioned, instead of a vented dirt hole breathing moisture into your framing. The materials below each solve a different part of that problem.
Why Damp Crawl Spaces Punish Wooden Floors First
A crawl space sits directly under the most vulnerable wood in the house: the sill plate, floor joists, rim joists, and subfloor. Bare soil constantly releases water vapor, and in summer, warm humid air entering through foundation vents meets cooler wood and condenses into liquid water. Wood that stays above roughly 20 percent moisture content becomes food for decay fungi, and once joists soften, the floor above starts to bounce, slope, or separate at the seams.
The damage is slow and mostly invisible, which is why it is expensive. Homeowners often notice a musty smell, a cold floor, or a sticking door before they ever look underneath. By then, sistering joists or replacing subfloor can cost many times more than the encapsulation that would have prevented it.
How Does Crawl Space Moisture Reach Your Wooden Floors?
Moisture reaches wooden floors through four routes, and a good system blocks all of them. Ground evaporation pushes vapor up from bare soil day and night. Humid outdoor air flows in through vents and condenses on cool framing. Liquid water seeps through porous block or stone walls after heavy rain. In some homes, plumbing leaks or poor exterior drainage add standing water that keeps the space damp for weeks.
Understanding these routes matters because each one needs a different material. A vapor barrier alone stops ground evaporation but does nothing about humid vent air. Sealing vents without a dehumidifier can trap moisture instead of removing it. That is why the strongest systems layer several materials together: a barrier for the ground, foam for the walls, sealed vents for the air, and mechanical drying for whatever remains.
Reinforced Polyethylene Vapor Barriers: The Foundation of Encapsulation
The vapor barrier is the single most important material in the system, and thickness is the difference between a liner that lasts decades and one that tears the first time a technician crawls across it. Codes commonly require a minimum 6-mil polyethylene sheet, but that is a bare minimum for a loose ground cover, not a full encapsulation. Professional systems use reinforced liners of 12 to 20 mil, with 20-mil fiber-reinforced polyethylene the standard for high-traffic spaces and rocky soil.
Choose a reinforced liner rated to ASTM E1745, the standard for vapor retarders in contact with soil, so puncture and tear resistance are tested, not just claimed.
Overlap seams by at least 12 inches and seal them with butyl or acrylic seam tape made for polyethylene, not ordinary duct tape.
Run the liner up the foundation walls to within a few inches of the sill plate, leaving a small gap so termite inspectors can still see the wall.
Mechanically fasten the wall portion with masonry fasteners and sealant so the liner cannot peel away over time.
Pick a white or light-colored liner: it brightens the space, makes leaks and pest activity visible, and shows future damage at a glance.
A well-installed barrier should look like a continuous bathtub liner, with no gaps at piers, pipes, or wall joints. Every penetration needs a collar of liner material sealed around it, because a single unsealed pipe opening can let in enough vapor to undo the rest of the job.
Drainage Mats and Dimpled Membranes That Keep Water Moving
A drainage mat, also called a dimpled membrane, goes underneath the vapor barrier on the floor. Its raised dimples create a small air gap that lets any water finding its way under the liner flow toward a sump pit or drain instead of pooling against the barrier. In homes with a history of standing water, this layer is what separates a system that manages water from one that merely hides it.
Rigid Foam Board Wall Insulation That Doubles as a Moisture Shield
Once the floor is sealed, the foundation walls are next. Rigid foam board, typically extruded polystyrene (XPS) or polyisocyanurate, is fastened to the interior face of the foundation walls over the vapor barrier. Unlike fiberglass batts, which absorb moisture, sag, and grow mold when damp, closed-cell foam boards do not soak up water and they add real insulation value at the same time.
Two inches of XPS on the walls gives roughly R-10 while keeping the wall surface warm enough to resist condensation.
Foam boards must be sealed at joints with compatible tape or foam sealant so humid air cannot slip behind them.
Check local code: foam insulation in a crawl space usually needs a thermal barrier or an approved ignition barrier, depending on access and use.
In termite-prone regions, keep foam and liner details inspectable and discuss treatment options with your pest professional before covering walls.
Insulating the walls instead of the floor joists is a deliberate choice in modern encapsulation. It keeps the crawl space itself inside the conditioned envelope, so ducts and pipes down there stay warm in winter, and the wooden floor above sits over dry, tempered air instead of a cold damp void.
Closed-Cell Spray Foam for Irregular Stone and Block Walls
Some crawl spaces defeat sheet goods: fieldstone foundations, uneven block walls, and tangled pipe runs leave gaps rigid boards cannot seal. Closed-cell spray foam expands into every crevice and cures into a rigid layer that acts as vapor barrier, air barrier, and insulation in one application, at roughly R-6 to R-7 per inch. It costs more per square foot than foam board and must be installed by a trained crew, but for irregular masonry it is the best choice.
Spray foam is not a substitute for the floor liner. Use it on the walls and rim joists, keep the heavy reinforced liner on the floor, and the two materials together form a continuous sealed envelope. Never let foam bury wiring, plumbing shutoffs, or access panels that a future technician will need to reach.
Crawl Space Encapsulation Materials Compared Side by Side
No single material does the whole job. Use this comparison to see what each layer contributes and where each one falls short on its own.
Sealing Vents, Seams, and Penetrations Without Trapping Moisture
Sealing is where good encapsulation jobs separate from bad ones. A vent left open, a seam left untaped, or a pipe left unsealed becomes the one leak that keeps the space damp. At the same time, sealing without a drying strategy can trap moisture behind the liner and make rot worse, so sealing and dehumidification must happen together.
- Close and seal every foundation vent with an insulated vent cover, then seal the edges with foam or caulk.
- Seal the rim joist area where the framing meets the foundation, a common air-leak path.
- Wrap and tape liner collars around every pipe, pier, and support column.
- Seal the access door or hatch with weatherstripping so it closes airtight.
- Run the dehumidifier and check humidity for several weeks before declaring the job finished.
Dehumidifiers and Humidity Targets That Keep Wood Below the Rot Threshold
Even a perfectly sealed crawl space needs active drying. Small amounts of moisture still enter through the soil and walls, and without a way out, humidity creeps up. A commercial-grade crawl space dehumidifier, sized to the space and connected to a drain so nobody has to empty a bucket, is the component that holds relative humidity in the safe band of roughly 45 to 55 percent. Below that range wood stays dry; above 60 percent mold and decay fungi become active.
Choose a unit rated for cool crawl space conditions, not a standard basement dehumidifier, and add a humidistat or remote monitor so you can check levels without crawling underneath. A simple humidity alarm is worth the small cost, because a failed dehumidifier can undo a good encapsulation silently over a single wet season.
Crawl Space Encapsulation Costs in Broad Terms
Full encapsulation is a mid-range project, and costs vary widely with the size of the crawl space, its condition, and the materials chosen. As a broad guide, a complete professional job often falls in the low thousands to the mid-teens of thousands of dollars, with larger or flood-prone spaces at the higher end. For scale, a quality 20-mil liner runs roughly fifty to seventy-five cents per square foot, rigid foam wall insulation adds roughly a dollar fifty to three dollars per square foot of wall, and a commercial crawl space dehumidifier typically costs several hundred to nearly two thousand dollars for the unit. Get at least two detailed quotes that itemize liner thickness, foam type, drainage, and the dehumidifier model.
When Encapsulation Needs a Structural Engineer or Waterproofing Pro
Encapsulation is a moisture-control system, not a structural repair. If joists are already sagging, sill plates are rotted, or floors bounce noticeably, bring in a structural engineer or a qualified foundation contractor before spending on liners and foam. The same applies to active flooding: encapsulation manages vapor and minor seepage, but a crawl space that fills with water needs exterior drainage, a sump system, or foundation waterproofing first. Also call a professional for heavy mold growth, pest damage, or asbestos-wrapped pipes, since disturbing those materials without proper precautions creates a health risk.
Final Thoughts: Is Crawl Space Encapsulation Worth It for Wooden Floors?
For a home with wooden floors over a damp crawl space, encapsulation is one of the few upgrades that protects the structure, improves indoor air, and steadies comfort all at once. The materials are proven, the system is straightforward, and the cost is modest next to joist replacement or a full floor rebuild. Start with the thickest liner you can justify, seal every seam and vent, insulate the walls, and keep humidity in the safe band with a real dehumidifier.
Crawl Space Encapsulation FAQs for Wooden Floor Protection
How long does crawl space encapsulation last?
A professionally installed system with a 20-mil reinforced liner, sealed seams, and foam wall insulation commonly lasts twenty years or more. The liner itself is the longest-lived part; dehumidifiers usually need replacement after roughly a decade, and seals should be checked annually.
Can I encapsulate a crawl space myself?
A handy homeowner can install a basic liner and seal vents, but full encapsulation involves heavy materials, tight working conditions, and details like rim-joist sealing and dehumidifier sizing that are easy to get wrong. Most owners get better results hiring a specialist and inspecting the finished work themselves.
Will encapsulation stop my floors from squeaking?
It can reduce squeaks caused by moisture-swollen or shrinking subflooring, but it will not fix squeaks from loose nails, missing blocking, or framing that was never fastened well. Dry wood is more stable, so encapsulation helps, yet a squeak that persists after drying usually needs a fastener or adhesive fix.
Does encapsulation help with radon?
Sealing the crawl space can reduce radon entry, and many systems include a radon mitigation connection, but encapsulation alone is not a certified radon remedy. If radon levels are a concern, test first and add a dedicated mitigation system designed by a qualified professional.
Should vents be sealed in every climate?
Sealed, conditioned crawl spaces are now accepted by the International Residential Code as an alternative to vented ones, and they perform better in humid climates. In very dry climates a vented crawl space can work, but the sealed approach with a dehumidifier is the safer choice wherever summer humidity is high.
What humidity level protects wooden floors best?
Aim for relative humidity between 45 and 55 percent in the crawl space. Wood moisture content follows the air around it, and this range keeps joists and subflooring below the threshold where decay fungi thrive while avoiding the overdrying that can shrink wood and open gaps.